Organize Messy Photos with an Image Management Tool
When your photo library grows into the tens of thousands, manual folders stop working. You remember what a photo looks like, not what it was named. An image management tool turns the photos themselves into the search index, so you can find, group, and reuse images without guessing filenames.
This guide explains a repeatable workflow to tame chaotic PC photo libraries. It focuses on local, privacy-safe organization: index the right folders, search by image, refine by similarity, and archive the best versions into a clean library you can reuse later.
Why PC photo libraries spiral into chaos
Most messy photo libraries have the same three root causes:
- Filenames are meaningless:
IMG_1023andScreenshot-2026-01-20are not searchable memories. - Folders keep moving: projects rename, drives change, backups duplicate. Paths lose meaning fast.
- Multiple versions pile up: edits, crops, exports, and near-duplicates blur together.
Once the library reaches this scale, “just organize more” fails. You need a way to search by the image itself, then turn the results into a cleaner structure.
Common triggers that make the chaos worse:
- Multiple devices exporting into the same folder (phone + camera + downloads)
- Re-exports for social media, presentations, or client delivery
- Old backups merged back into active folders
- Screenshot-heavy workflows with no naming discipline
An image-first workflow solves the root problem: you remember the visual, not the filename.
There is also a hidden cost: when you cannot find the right photo quickly, you stop reusing your own assets. That leads to re-editing, re-exporting, and keeping multiple versions “just in case,” which multiplies clutter. A reliable search loop turns the library into something you trust again.
What an image management tool actually fixes
A practical image management tool combines indexing with visual search and folder-aware filtering. The goal is to replace manual browsing with a visual, repeatable loop:
- Local indexing across multiple folders and drives
- Search by image to group similar or same-scene photos
- Similarity + folder filters to converge fast
- Open source folder to act on the real files
- Archive selects to reduce future noise
Because everything runs locally, you keep privacy for personal photos, client work, and internal assets. You can index multiple drives without uploading anything to the cloud, and the source paths stay actionable for cleanup. For a setup guide, see: /en/docs/first_init.
If you have photos spread across a laptop, an external drive, and a work NAS, a local index is the only way to make them feel like one library.
The most practical wins look like this:
- Recover a specific version without hunting through exports
- Group an entire event or scene in one screen
- Build a reusable “selects” library that stays clean over time
A repeatable workflow: index → search → refine → archive
The fastest way to clean a messy library is to use the same loop every time. Below is the workflow that scales and stays stable.
Preparation checklist before you start
Spending ten minutes here prevents hours of rework later:
- Decide your primary goal: fast retrieval, long-term reuse, or storage cleanup
- Pick 1–3 folders you actually open every week (do not start with everything)
- Confirm indexing is complete in gallery management so results are reliable: /en/docs/gallery-management
- Create a temporary “To-Sort” folder for scattered photos before the first run
- Avoid renaming major folders during the first week so the index paths stay stable
Step 1: index only the folders you really use
Start small. Index 1–3 high-frequency folders first (current projects, family albums, or photo exports). Avoid download dumps and chat caches at the beginning. This keeps the results clean and speeds up your first runs.
If you are sitting on years of photos, add one or two new folders per week. Slow expansion keeps results usable and prevents indexing from taking over your day.
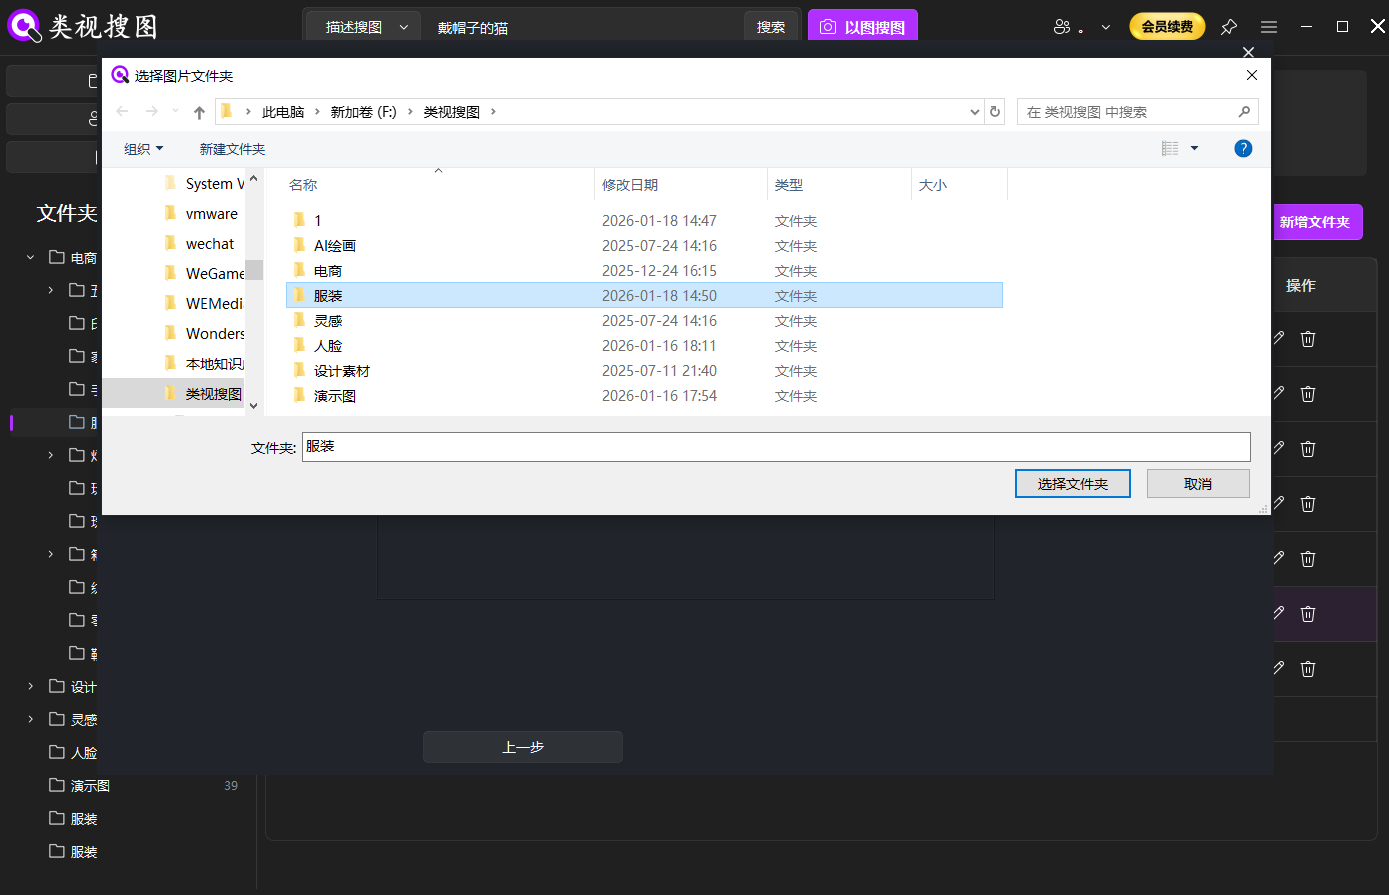 Caption: Index your most-used photo folders first so the image management tool can return clean, focused results.
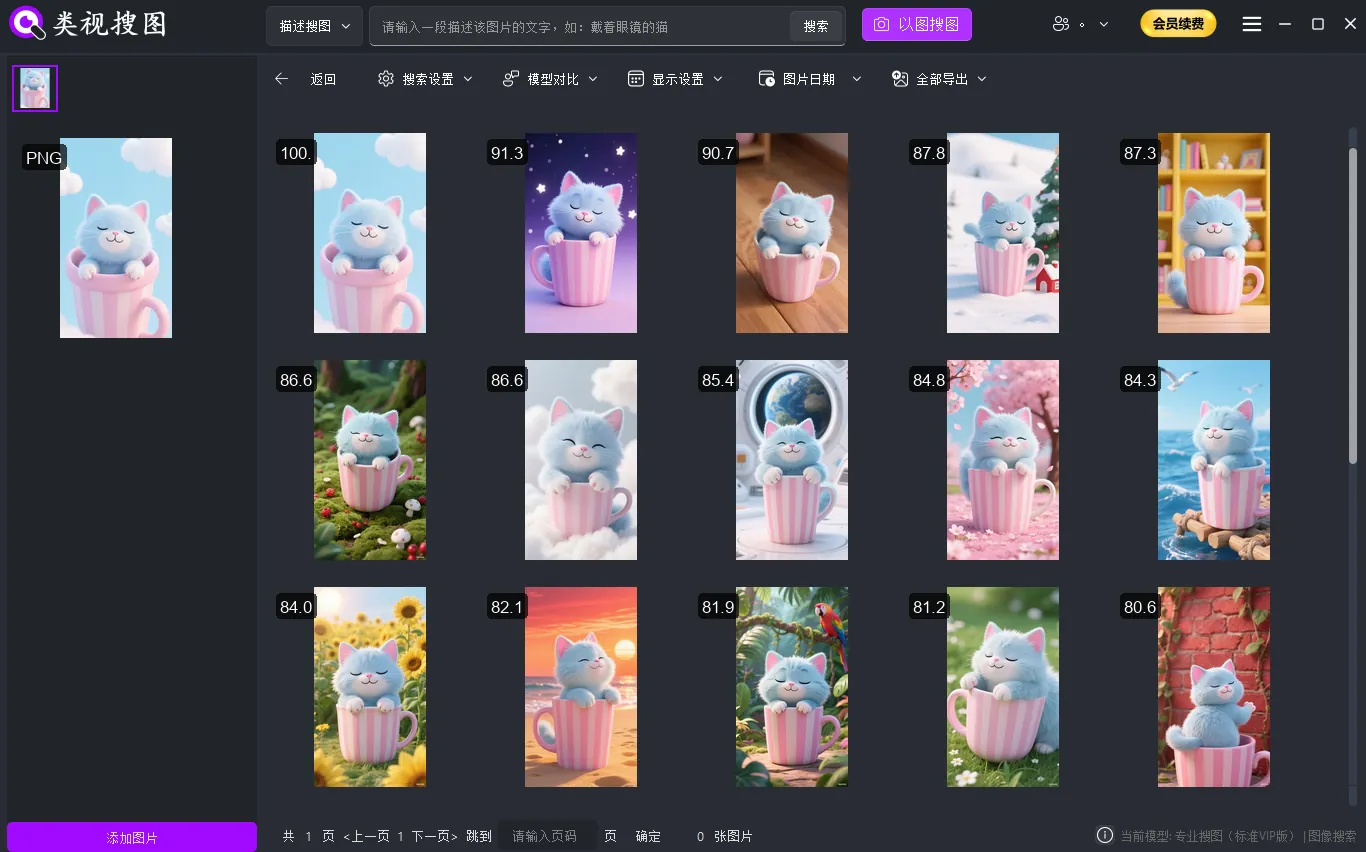
Step 2: search by a reference image to pull a scene cluster
Pick one clear photo to start. A sharp image with a clear subject is the best reference for similarity search. Use a strict similarity threshold first, then relax it to catch angle or lighting changes.
Reference photo checklist:
- Clear edges and strong contrast
- The full subject in frame (not overly cropped)
- Fewer overlays or text blocks that can skew similarity
When you are unsure, run two searches with different reference photos. One tight reference locks the closest matches; a second, broader reference captures nearby variations you might want to keep.
 Caption: A strong reference photo helps the image management tool gather the right scene cluster quickly.
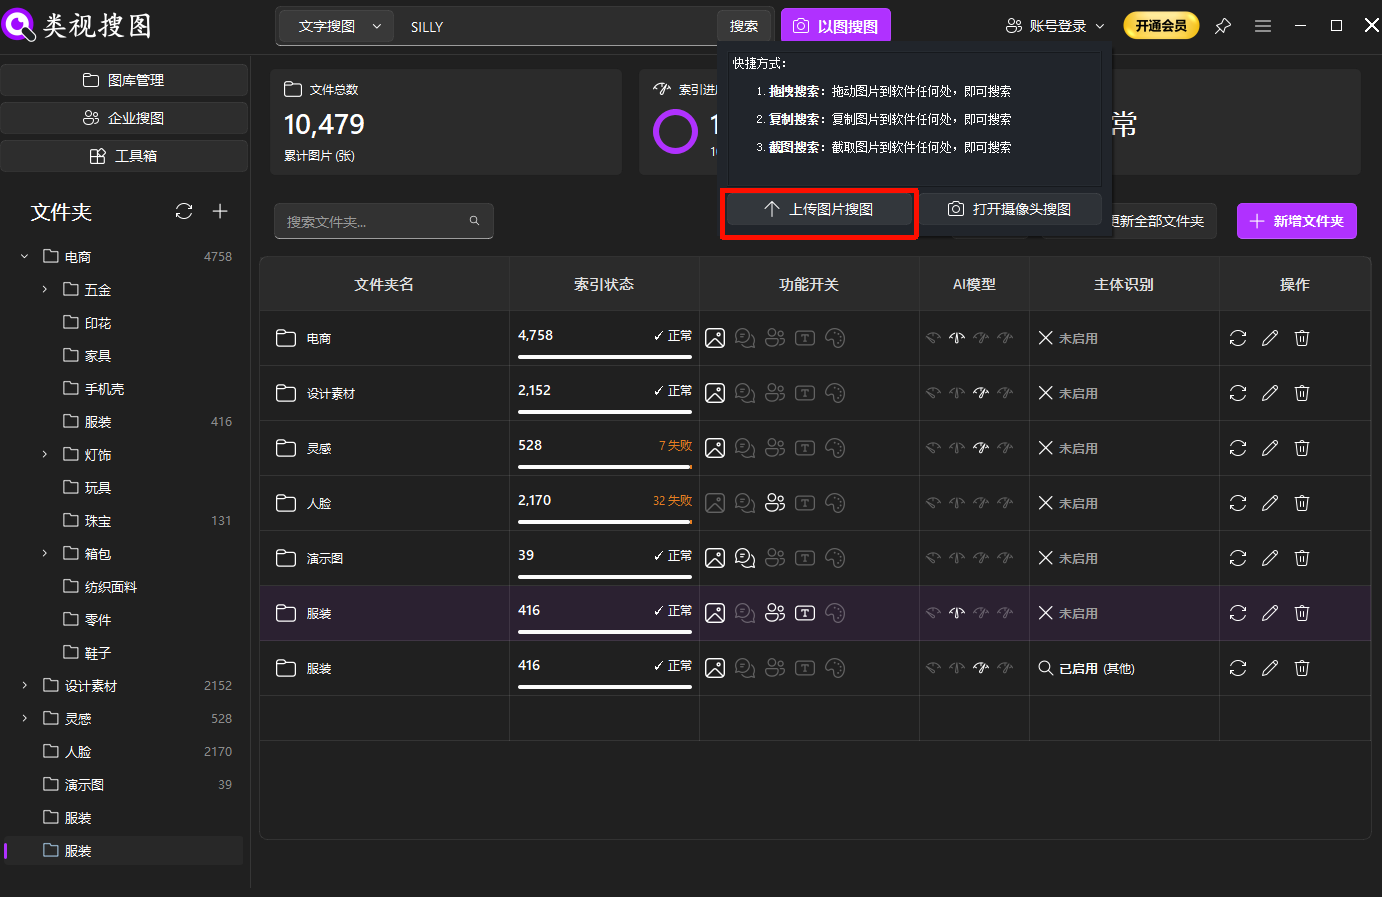
Step 3: refine with similarity + folder filters
If results look broad, raise similarity first, then filter by folder scope, and only then lower similarity to expand. This order prevents you from drowning in results and keeps your decisions fast. Result filtering tips: /en/docs/browsing-images.
Recommended convergence order:
- Increase similarity to lock the closest cluster
- Filter by folder or project scope
- Lower similarity to include small variations
 Caption: Converge results with similarity and folder filters, then open the source folder to act on the files.
Step 4: open the source folder and archive the best versions
Never stop at “found.” Open the source folder, pick the best versions, and move them into a curated “selects” folder. This step is what turns search into long-term organization.
Selection criteria that work well for most people:
- The clearest frame with the best lighting
- The most complete composition (nothing important cropped)
- The newest edited version if you have multiple exports
Build a classification structure that stays usable
You do not need a complex taxonomy. What works is a lightweight structure that is easy to maintain every week:
- Timeline folders for personal or event photos (e.g.,
2026/Trips/,2026/Family/) - Topic libraries for work assets (e.g.,
Assets/Posters/,Assets/Product Shots/) - Selects library for the best, reusable versions only
The selects library is critical. It becomes the first place you search when you need high-quality versions without noise.
If you manage both personal and work photos, keep the top-level split clean:
Photos/2026/Trips/andPhotos/2026/Family/for personal memoriesAssets/Client-A/andAssets/Product-Shots/for work deliveries
This separation keeps results relevant when you filter by folder, and it makes archive cleanup easier later.
Example of a minimal, workable structure:
Photos/
  2026/
    Trips/
    Family/
Assets/
  Client-A/
  Product-Shots/
Selects/
Keep the structure stable. Renaming the top-level folders too often breaks the “open source folder” step and creates duplicate indexing effort.
For naming, short and consistent beats perfect. A pattern like 2026-03-Client-A-Launch or 2026-Trip-Japan makes sorting and filtering predictable across devices.
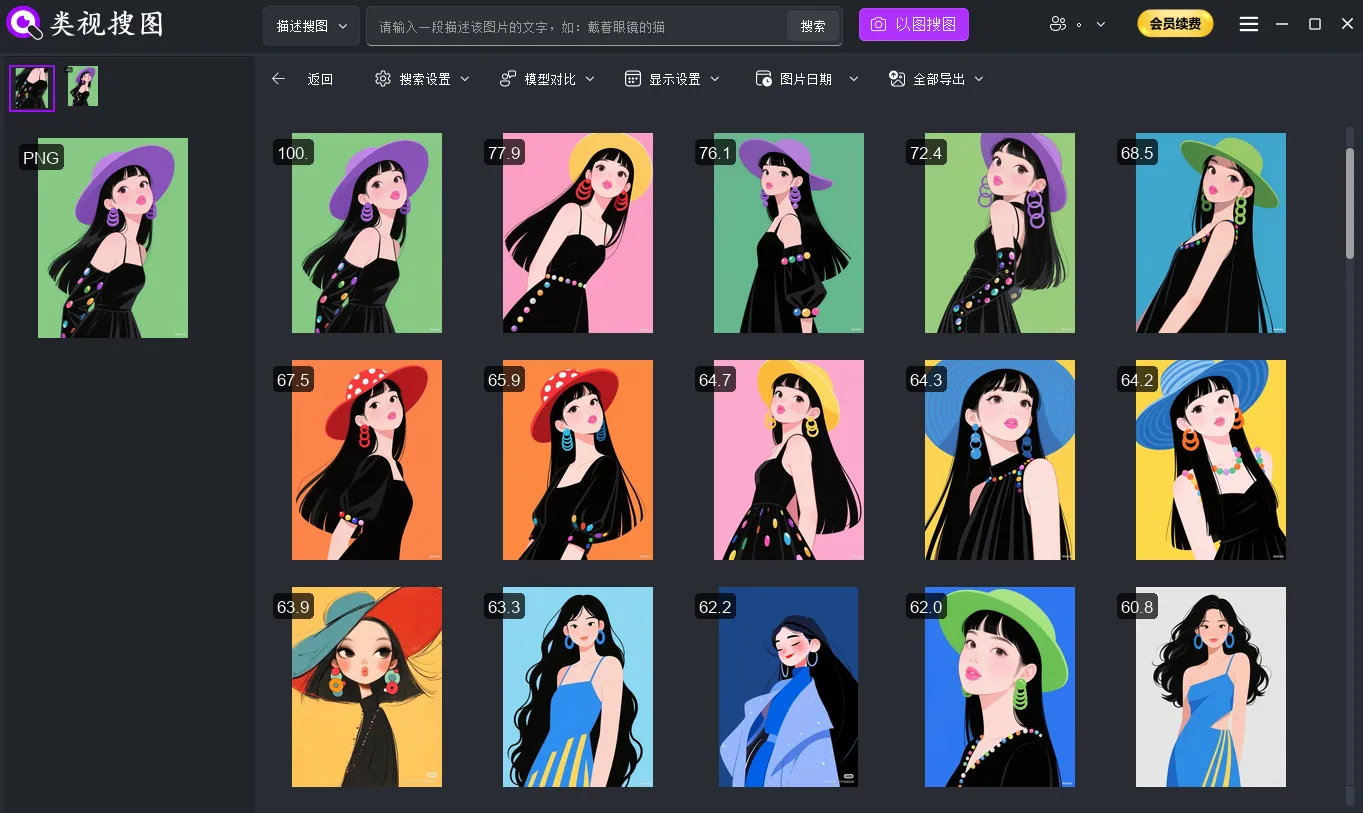 Caption: Use clustered results to pick the best versions and keep the selects library clean.
Keep the library clean and searchable
Clean duplicates and reduce future noise
After a few search runs, duplicates become visible. Use the results page to find near-duplicates, then keep only the best version per scene. When you do this consistently, search gets faster every month.
If you are worried about deleting the wrong file, add a two-step buffer:
- Move obvious duplicates into a “To-Delete” folder
- Keep that folder for 30 days before deleting
This keeps your library clean while lowering the risk of accidental loss.
A simple maintenance routine that works:
- Weekly: move new “keepers” into the selects library
- Monthly: archive inactive projects into a read-only folder
- After imports: sync indexing so new photos become searchable
If results look wrong (too many or too few), check the troubleshooting list: /en/docs/faq.
Combine search modes for better accuracy
Image search is the fastest entry point when you have a reference photo. When you do not, a second mode helps:
- Image search for near-duplicates or the same scene
- Semantic search when you only remember the idea or mood
- OCR text search for screenshots and documents with visible text
A reliable sequence is: semantic expansion → image search convergence → OCR refinement. When you already have a clear reference photo, start with image search for speed, then add OCR if you need to pinpoint text-heavy screenshots.
If you mainly manage screenshots or research images, OCR becomes your fastest shortcut. When you manage personal photos, image search and timeline folders do most of the heavy lifting.
Mini FAQ:
Q: Should I delete duplicates immediately?
A: If you are unsure, move them into a “To-Delete” folder first. After a few weeks of normal use, delete what you never open.
Q: What if similarity results are noisy?
A: Narrow the folder scope first, then increase similarity, and only then broaden the threshold. Skipping scope is the most common mistake.
Q: How do I handle screenshot-heavy folders?
A: Put screenshots into a dedicated folder and use OCR search to locate specific text fast. For OCR tips, see: /en/docs/browsing-images.
If you want a deeper workflow on similar-photo grouping, this guide helps: /en/articles/posts/2026/cull-same-scene-photos-fast-with-local-similar-image-search.
Summary and next step
Organizing messy photos is not about willpower—it is about a consistent loop. Index a clean scope, search by image, refine with similarity and folder filters, then archive the best versions. Once that loop is fixed, your library stays organized with far less effort.
Next step:
- Index one high-frequency photo folder
- Run three reference-photo searches
- Move the best versions into a selects library
Ready to start? Download here: /en/download.